How to program oticon hearing aids
Step-by-step guide for wireless programming Oticon Genie and FittingLINK (WP-2)
Step-by-step guide for wireless programming
Oticon Genie and FittingLINK (WP-2)

Step 1 – Insert the Bluetooth adapter into the desk
stand (recommended) or the PC. Ensure that only one
Oticon Bluetooth adapter is connected. Wait for the
Windows USB driver to be installed.

Step 2 – To use the FittingLINK WP-2 neckpiece and
the Bluetooth Adapter pairing is needed. Press and
hold (5 sec) both the Bluetooth adapter button and the
FittingLINK WP-2 ON/OFF button. Both products’ LEDs
will start blinking and turn steady when paired

Step 3 – Enter Genie and click on “PREFERENCES”
and then “EDIT PREFERENCES”. Go to the
“PROGRAMMING DEVICE” tab
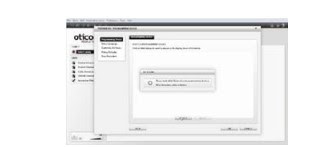
Step 4 – Press the “DETECT” button and wait for
FittingLINK to be detected. When detected click OK.

Step 5 – Insert fresh batteries in the hearing aids
and place them on each side of the neckpiece at a 5 -
10 cm (2 - 4 in.) distance.

tep 6 – Press the “DETECT” button in Genie and follow
the screen prompts.

Step 7 – Place the hearing aids and the FittingLINK
WP-2 neckpiece on the client
Turn off any secondary wireless programming
equipment before establishing the bluetooth pairing
between the bluetooth adapter and the selected
FittingLINK WP-2.
It is possible to have only one wireless programmer
connected at a time.


Post a Comment
Hello